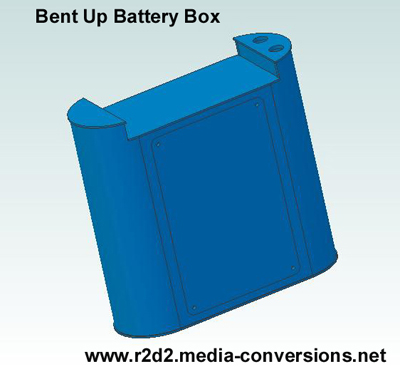
The Bent Up Battery Box

I have designed a battery box assembly built using custom formed styrene sheet for the semicircular ends of the box. All of the parts are cnc cut for accuracy, overlapping joints are used for strength. For maximum internal volume there are no internal supports inside the box. It's built entirely from .125 thick styrene components for strength. While this box has no cutouts for the motor, the next generation will be customized to accomodate the scooter motor foot drives that I'm working on.

You might reasonable ask why bother bending plastic? It's partly that I'm stubborn. I want to be able to place all of the drive electronics in the battery boxes where it's close to the feet. That means having as much open space as possible. It's also that there really isn't a good source for 3.0 inch OD plastic tube. What I've been able to find is polycarbonate shipping/ storage/display tubes. Polycarbonate is what's used in soda bottles. It's thin and would have to be reinforced. The same goes for using layers of .040 styrene. I also wanted to be able to cnc cut the pieces. And, I like a challenge. If you want to know how it's done take a look at my CNC machining site.


This is the Bent Up Battery Box

The image links to a 3d pdf file, click on it if you want to be able to rotate the image around and examine it from other angles. (Note, the 3d.pdf file opens in a new window. If you have problems with the 3d feature you may have to upgrade to the latest version of Adobe Reader).

After 'activating' the 3d mode by clicking on the display
select a part by left clicking on it (the part will be highlighted)
then right clicking brings up a window.  Follow the sequence
-> part options -> part render mode -> transparent
to make the outer parts transparent and the inner
details visible.


As with any design, there are limitations to what can be reasonably accomplished by CNC machining.  The top and bottom pieces are deliberately oversize to be filed down to match the exact contour. The inset parts of the curved ends have the wrong angle and need to be beveled to fit. A few other parts need to be trimmed as well.  See the Assembly Instructions for the highlights of what you'll have to do by hand.

The design drawings are available as both Autocad .dwg files and Adobe .pdf files download drawing files with the understanding that the drawings are copyright to Media-Conversions and are not to be used commercially. (That note also appears on each of the drawings). I've also put together a set of assembly instructions to help you put the box together. I'm not going to manufacture this version, I'll wait till the matching feet are done then revise it to fit the scooter motors.
 
Please use the Contact Form to send me comments, questions, or suggestions on making the design better.


Home