Engraved Skins

CS:R & CS:L Versions

UPDATE: 05/17/19 - updated to include availability of both CS:R and CS:L versions of skins in white. (04/16/20 - Black Skins are no longer available.)
Illustrations on this page use the CS:R skins - CS:L are similar (with changes for the Util Arms and body size dimensions/part placement)

I owe the concept of "engraved" single layer skins to Paul Murphy (joymonkey). I first saw them at DroidCon II where Paul used my frame to demonstrate wrapping an engraved skin. I then forgot about them until I started to design skins for the CNC shop I work with to cut. While 2-layer skins are the conventional route for most builders because they can be cut by hand, there are a number of problems with them. The biggest problem is that once the cutouts are made it's difficult to get the skins to wraparound the frame. The edges of the cutouts need to be clamped down and usually there's no way to do that. In looking at what the CNC shop had cut I realized that they had the capability to re-create engraved skins. I contacted Paul to make sure it would be OK with him as well as getting BC approval to offer engraved skins. [My BC rep is Steele Smith]. Just for background, I suggest that anyone starting out with skins review the section of Dave Everett's skin files for background. You can find them at Downloads -> 01-Official -> Dave Everett Styrene Files -> 02 - Skins.zip

Here's what the CNC Shop's first pass of the parts look like


All of the images above link to larger versions of the same image, just click on them.

Engraved skins are made from .080 HIPS so they can substitute for the 2-layer skins made from .040 HIPS. They are cut to 2 different depths as you can see from the backlit parts above. The brighter lines are cut to .060 depth [leaving  a .020 thick layer] the darker lines are cut to .040 [leaving a .040 layer - the same as you would have if you make the parts from 2 layers of .040]. The .040 thickness is used for panel lines and recesses for panels that are not typically removed. The .020 thickness is used where sections will be removed after the skins are glued in place. Several of the panels have lips to support parts that are typically glued onto the skins. In the drawings below the red lines are .020 thick, the green lines and areas are .040 thick. The purple (coin slots) are the only cutouts on the sheet. As above, the small images link to larger versions.


Paul's original part run was Forum -> Droid Parts! -> Archived Part Runs -> BC Approved: Single-Layer Milled Styrene Skins

There is a lot of information there so spend some time and read the thread. My version has a number of differences:
1. I'm only offering the 1/2 wrap version. shipping the larger 3/4 wrap version runs into package size limitations
2. I do not offer any part engraving for parts like the octagon port, power coupling or any of the other parts installed in or on the skins (see "Pasties" below).
3. I've made the skins slightly oversized. They are .0625 larger at top and bottom. That was done to accomodate slight differences in frame sizes. The left & right edges have been cut to precisely the frame size and the sections that mount to the skin attachment blocks stand out from the rest of the skin panel to make it easier to see the position when installing. See the skin mounting instructions for more details. The .080 material is easy to trim in any case.

Doors, Frames, Hinges & Pasties
design status as on 02/05/16 - the following sections are a "work in progress"
One of the drawbacks of engraved skins is that you don't get an edge to mount a door panel against. With a styrene skin you also need a backing to hold the curve of the skin when you cut a door panel free from the skin. Finally you need a hinge so the door can open. This is a work in progress, but here's what I've got so far.


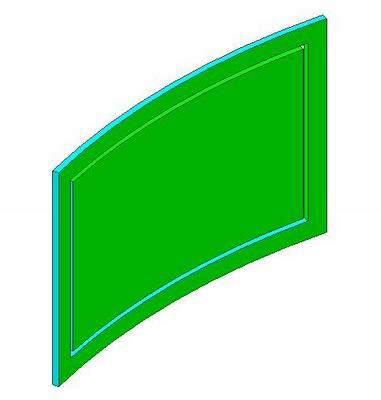
start with a door cut into the skins

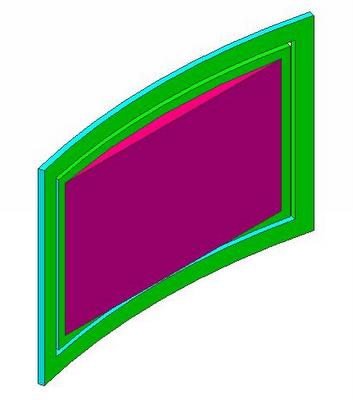
add a door backer to hold the curve of the skins

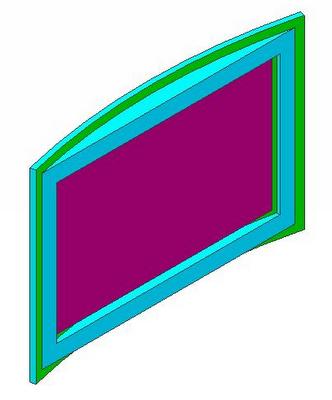
add a fame around the backer that provides a lip for the door to close against

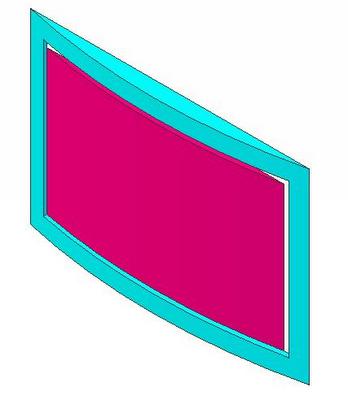
here's a view of the backer and frame from the front without the skins

Hidden Hinges
No use having a door unless you can open it. For that you need a Hinge. I tried doing some research on hinges. In particular I was looking for what are called "Hidden Hinges". For the R2 builders, what is called the JAG hinge, after Jerry Greene, is a prime example of a hidden hinge. Car doors use hidden hinges. Curiously, I didn't find much in the way of design (how to create one) information. I did find one for an aircraft service panel. I also found the HES3D-120 concealed hinges made by Sugatsune. That was useful mostly because they provide 3D cad drawings. Here's what I was able to make from their design.


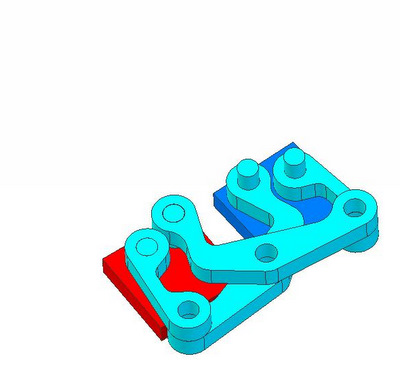
We start with the door (attached to the red square) closed .
The blue square is mounted to the frame.

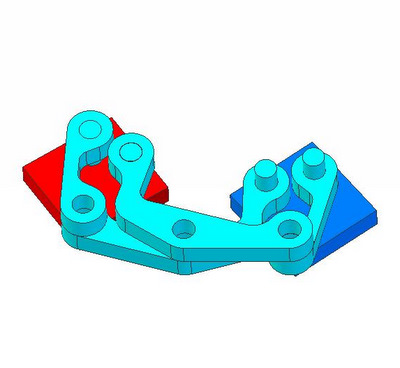
Here the door has been rotated to the 1/2 open position.

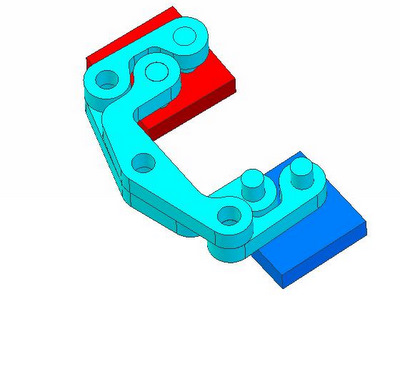
And in this image, the door is folded back, fully open.


Pasties (04/16/20 update - Pasties are no longer being offered)
For those of you who liked having engraved parts as place holders until you could get real parts to install I've developed a set of 'pasties' made by 3D printing they can easily be glued to the skins. Pasties have up to 4 layers. Each layer is .4mm so the total height is 1.6mm or about .063 samples below.


Home